- Home
- Mixing & Mastering Articles
- Mixing & Mastering Checklist Reference Chart
Mixing & Mastering Checklist Reference Chart

✔️ Mixing & Mastering Checklist Reference Chart
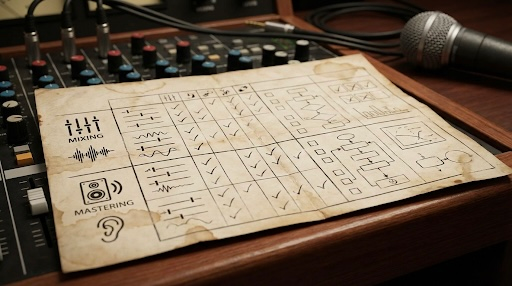
I. 🎛️ Mixing Phase
The goal of mixing is to achieve a balanced, clear, and impactful stereo file (the "Pre-Master").
| Step | Focus Area | Key Actions | Notes & Rationale |
| 1. Setup & Organization | Workflow Foundation | * Gain Staging: Set all track faders to 0 dB and adjust clip/region volumes or trim plugins so all channels peak around $-18$ to $-12$ dBFS (or $-8$ to $-6$ dBFS in 32-bit float DAWs) to ensure proper headroom. * Track/Session Organization: Name tracks, color-code, group (e.g., Drums, Vocals, Instruments), and use track folders/VCA groups. | Good initial gain staging is crucial for proper plugin function and avoiding early digital clipping. Organization speeds up the entire process. |
| 2. Static Mix (Balance) | Core Volume & Panning | * Set Levels: Adjust faders to achieve the basic desired balance, focusing on the most important elements (usually the lead vocal or main instrument). * Pan: Position instruments in the stereo field (e.g., kick/snare/bass center, hi-hats/cymbals slightly panned, guitars/keys wide). | This should sound like a complete song, even without any processing. Spend significant time here. |
| 3. Subtractive EQ | Cleaning Up Frequencies | * High-Pass Filters (HPF): Filter out unnecessary low-end rumble from non-bass elements (e.g., vocals, high-hats). * Notching: Find and eliminate sharp, resonant, or muddy frequencies in individual tracks (e.g., boxy mid-range on vocals). | Creating "space" for main elements by removing unwanted frequency content before boosting. |
| 4. Compression & Dynamics | Shaping Attack & Sustain | * Compressors: Apply to individual tracks and busses (like drums or vocals) to control dynamic range, increase sustain, or add punch/glue. * Gates/Expanders: Use sparingly to remove unwanted noise or increase dynamic range. | Ensures consistent levels and helps instruments sit correctly in the mix. |
| 5. Additive EQ | Enhancing Tone & Clarity | * Boosting: Gently enhance desirable frequencies to bring out character, clarity, or air (e.g., high-shelf on vocals for "air," low-mid boost on a kick for "thump"). * Focus on context: EQ tracks to complement each other, not just to sound good in solo. | This is where you finalize the track's tone and character. |
| 6. Time-Based Effects | Depth & Space | * Reverb: Add depth and dimension. Use various types (room, plate, hall) on send/return tracks. * Delay: Add rhythm and width. * Chorus/Flanger: Apply for creative texture and movement. | These effects are generally added using send/return tracks to maintain clarity and control. |
| 7. Automation | Movement & Energy | * Volume Automation: Ride the faders (or use plugin gain) to highlight key words, smooth transitions, or push instruments in/out of the arrangement. * Effect Automation: Automate sends, panning, or filter cutoff frequencies to create interest. | Crucial for making the mix feel alive and dynamic. |
| 8. Final Review & Delivery | Quality Check | * Check in Mono: Ensure the mix retains its balance and impact when summed to mono (a good gauge of phase coherency). * Listen on various systems: Car, headphones, studio monitors, small speakers. * Export the Pre-Master: Export a 24-bit (or 32-bit float), un-clipped stereo WAV/AIFF file with NO processing on the master bus (or only light metering/reference limiting). Leave at least $-3$ to $-6$ dBFS of headroom. | This file is what you give to the mastering engineer (or use for self-mastering). |
II. 🔊 Mastering Phase
The goal of mastering is to finalize the tonal balance, optimize the perceived loudness, and prepare the track for distribution. Mastering should be done on the final stereo file from the mixing phase.
| Step | Focus Area | Key Actions | Notes & Rationale |
| 9. Critical Listening & Reference | Analysis & Target | * Listen: Analyze the pre-master for any remaining issues. * Reference Tracks: Compare the pre-master to professionally mastered tracks in the same genre for tonal balance and loudness targets. * Sequence/Spacing (Album Mastering): Determine track order and the silent gap length between songs. | Identifying the master's goals before processing. |
| 10. Mastering EQ | Tonal Refinement | * Broad Strokes: Apply very subtle, wide-Q EQ adjustments (usually less than $\pm 1$ dB) to correct the overall tonal balance (e.g., add a little 'sheen' or 'warmth'). | Should be corrective and enhancement-oriented, addressing the mix as a whole. |
| 11. Mastering Compression / Limiting | Final Dynamics & Loudness | * Subtle Compression/Saturation: Optionally use a gentle compressor or saturator for glue, punch, or harmonic enhancement. * Final Limiting: Apply a brick-wall limiter to bring the level up to the industry standard and ensure the true peak does not exceed the target (usually $-1.0$ dBTP for most services, or $-0.3$ dBTP for older CD standards). | The crucial step for loudness and competitive volume. Watch the metering closely. |
| 12. Metering & Target Loudness | Conformance | * Check Integrated LUFS: Adjust the limiter/gain so the track hits the required Integrated Loudness Unit Full Scale (LUFS) for streaming platforms: Spotify, Apple Music, YouTube generally target around $-14$ LUFS. * Check True Peak (TP): Ensure the True Peak level is at or below the target (e.g., $-1.0$ dBTP). | Services often use Loudness Normalization, so targeting around $-14$ LUFS is common practice for dynamic masters. |
| 13. Dithering & Delivery | Final Output | * Dither/Noise Shaping: Apply if reducing the bit depth (e.g., going from a 24-bit master to a 16-bit CD master). This should be the absolute last step. * Final Export: Export the final, mastered file at the required sample rate and bit depth (e.g., 44.1 kHz, 16-bit for CD or 48 kHz, 24-bit for hi-res streaming). | The last step of the process. Double-check all file requirements. |